Calendar
|
|
July '24 | |||||
| Mon | Tue | Wed | Thu | Fri | Sat | Sun |
| 1 | 2 | 3 | 4 | 5 | 6 | 7 |
| 8 | 9 | 10 | 11 | 12 | 13 | 14 |
| 15 | 16 | 17 | 18 | 19 | 20 | 21 |
| 22 | 23 | 24 | 25 | 26 | 27 | 28 |
| 29 | 30 | 31 | ||||
Quicksearch
Syndicate This Blog

Categories
Blog Administration
Powered by
Lizenz/License
Der Inhalt dieses Blogs ist © Copyright 2009 Ralf Ertzinger. Jegliche Reproduktion und Wiederverwertung nur mit schriftlicher Genehmigung des Autors.
The content of this blog is © Copyright 2009 Ralf Ertzinger.
Sunday, July 15. 2012
Creating a throwaway browser
Once every other while it's useful to have a browser that's not connected to the normal browsing profile (I know. Don't say it. I've been here a while).
These are two shell scripts that create a new profile for Firefox and Chrome in a temporary directory, start the browser using that profile and remove the directory afterwards.
Chrome
#!/bin/bash
trap cleanup EXIT
die() {
    echo $@
    exit 1
}
cleanup() {
    [ -d ${CHROMETMP} ] && rm -rf ${CHROMETMP}
}
CHROMETMP=$(mktemp -d)
[ -d ${CHROMETMP} ] || die "Could not create temp dir"
chromium-browser --user-data-dir="${CHROMETMP}"
Firefox
#!/bin/bash
trap cleanup EXIT
die() {
    echo $@
    exit 1
}
cleanup() {
    [ -d ${FIREFOXTMP} ] && rm -rf ${FIREFOXTMP}
}
FIREFOXTMP=$(mktemp -d)
[ -d ${FIREFOXTMP} ] || die "Could not create temp dir"
export HOME=${FIREFOXTMP}
firefox -no-remote -CreateProfile 'throwaway' || die "Could not create profile"
firefox -no-remote -P 'throwaway'
Sunday, July 1. 2012
Installing CentOS 6 from a rescue system
I recently accquired a root server hosted by Manitu. It was planned to run Centos 6 on that server, but unfortunately that is not in the list of operating systems that can be preinstalled (or reinstalled) via the management web page.
There is, however, a rescue system, an option to remotely boot the server into a bare bones Linux system via the network. Since an OS is basically a bunch of bits on a hard disk it should be possible to get said bits onto the hard disk from the rescue system.
Now, there are some things to consider. First of all, this is not for someone new to Linux or CentOS. There are lots of ways for things to go wrong or not end up as expected. The usual failure mode for this is the remote system not booting, which is kind of hard to debug without any further information. Also, this will erase all data on the hard disks in the system.
The partitioning scheme is what I needed for my system. Adjust as needed. If you don't know how that's the first clue that you should not be doing this in the first place.
Preconditions
Some of the things needed for this to work:
- The rescue system has to support the hardware you want to install on (mainly network and hard disk controllers). Since the rescue system is provided by the hoster this is usually the case, but it does not hurt to check.
- The rescue system has to support software RAID (if you want it), LVM (if you want it) and all file systems you want to use (or at least the ones needed to boot the system)
- The rescue system kernel has to be reasonably similar to the CentOS installer kernel. Being newer is usually not a problem, being much older can be.
- wget (or some other way to download files via HTTP)
- File system support in the kernel for ISO9660, squashfs and ext3
- At least 2GB of RAM
- Hardware supported by CentOS 6. If CentOS 6 would not install or boot on the system when doing a normal (CD/DVD based or network) install then chances are that installing it this way will not work either.
It is further assumed that a tmpfs file system is mounted at /dev/shm.
Install plan
The hardware in question here has two SATA HDDs on AHCI compatible controllers without any hardware RAID. The final hard disk layout will be as follows:
/dev/md0, 1GB, consisting of/dev/sda1and/dev/sdb1, ext3, mounted at/boot/dev/md1, 64GB, consisting of/dev/sda2and/dev/sdb2, LVM PV
The PV is part of a volume group which contains an LV holding the root file system.
Prepare the Live CD
The rescue system usually has no CentOS specific tools (like RPM) which are needed to install the OS packages. In order to get a usable install environment we'll commandeer the CentOS 6 live CD. It contains a complete root file system image.
- Download the current live CD ISO image from "http://mirror.centos.org":http://mirror.centos.org, putting the file into
/dev/shm. Be sure to grab the CD for the right architecture (the right architecture is x86_64, by the way). - Create a bunch of directories
mkdir /loop1 /loop2 /sysroot
- Mount the root image (this is a bit recursive)
  mount -o ro /dev/shm/CentOS-6.2-x86_64-LiveCD.iso /loop1
  mount -o ro /loop1/LiveOS/squashfs.img /loop2
  mount -o ro /loop2/LiveOS/ext3fs.img /sysroot
- Bind mount needed virtual file systems
  mount -o bind /dev /sysroot/dev
  mount -o bind /proc /sysroot/proc
  mount -o bind /sys /sysroot/sys
Now chroot into /sysroot and try running some commands (RPM, yum). If this does not work then the rescue system kernel is probably too far from the live CD kernel, and this adventure ends here.
The image mounted at /sysroot is read only. This will not do, since we need to change DNS entries, so create a writable /etc:
  mount -t tmpfs tmpfs /tmp
  rsync -a /etc /tmp
  mount -o bind /tmp/etc /etc
Ignore the mtab warning the first command produces. After this, fill in /etc/resolv.conf with some name servers and try to pinging something by name.
Prepare for installation
Leave the chroot again (working with LVM does not work within it).
Remove and stop any existing volume groups and software raids. Then partition the hard disks according to the new scheme and create the new software RAIDs and LVMs.
  fdisk -u -c /dev/sda
  sfdisk -d /dev/sda | sfdisk --force /dev/sdb
  mdadm --create /dev/md0 -n 2 --level 1 --metadata=0.90 /dev/sda1 /dev/sdb1
  mdadm --create /dev/md1 -n 2 --level 1 /dev/sda2 /dev/sdb2
  pvcreate /dev/md1
  vgcreate -s 64M vg_tara_root /dev/md1
  lvcreate -n lv_swap -L 8G vg_tara_root
  lvcreate -n lv_c6_root -L 16G vg_tara_root
  mkfs.ext3 /dev/md0
  mkfs.ext4 /dev/mapper/vg_tara_root-lv_c6_root
  tune2fs -c0 -i0 -r32000 -L boot /dev/md0
  tune2fs -c0 -i0 -r32000 -L lv_c6_root /dev/mapper/vg_tara_root-lv_c6_root
It's probably a good idea to wait for the RAID resync, that should not take long. The metadata version on /dev/md0 is needed to help the boot loader.
- chroot into
/sysrootagain. - Prepare a directory tree to hold the system to be installed (it's also called sysroot. Yes, this is intentionally confusing):
  mkdir /tmp/sysroot
  mount /dev/mapper/vg_tara_root-lv_c6_root /tmp/sysroot
  mkdir -p /tmp/sysroot/{boot,dev,proc,sys}
  mount /dev/md0 /tmp/sysroot/boot
  mount -o bind /dev /tmp/sysroot/dev
  mount -o bind /proc /tmp/sysroot/proc
  mount -o bind /sys /tmp/sysroot/sys
Installation
- Prepare the RPM database in the new system:
rpm --root /tmp/sysroot --rebuilddb
- Download the centos-release RPM from the current CentOS 6 build (again: architecture) into
/tmpand install it:
rpm --root /tmp/sysroot -ihv /tmp/centos-release-6-2.el6.centos.7.x86_64.rpm
- Now install the CentOS base system. This ought to install 300 to 350 packages, depending on the release. Confirm the GPG key import question, and ignore the DBUS error at the end. Depending on network connection and hard disk speed this may take a while.
yum --installroot=/tmp/sysroot groupinstall base
- Install the bootloader and SSH server package.
yum --installroot=/tmp/sysroot install grub openssh-server
- Unmount the newly installed system and clean up the chroot
umount /tmp/sysroot/{boot,dev,proc,sys,} /etc /tmp
- Leave the chroot
- Remove the live CD image
  umount /sysroot/{dev,proc,sys,}
  umount /loop2
  umount /loop1
- Mount the new system under
/sysroot
  mount /dev/mapper/vg_tara_root-lv_c6_root /sysroot
  mount /dev/md0 /sysroot/boot
  mount -o bind /dev /sysroot/dev
  mount -o bind /proc /sysroot/proc
  mount -o bind /sys /sysroot/sys
- chroot into
/sysroot - Set the password for root
- Create a symlink for
/etc/mtab
ln -s /proc/mounts /etc/mtab
- Install the boot loader
grub-install /dev/md0
- Remove
/etc/mtab - Populate
/etc/fstab. Do not use raw device names here, especially not for software RAIDs. Use labels or UUIDs.
  LABEL="lv_c6_root"      /                       ext4    defaults        1 1
  LABEL="boot"            /boot                   ext3    defaults        1 2
  tmpfs                   /dev/shm                tmpfs   defaults        0 0
  devpts                  /dev/pts                devpts  gid=5,mode=620  0 0
  sysfs                   /sys                    sysfs   defaults        0 0
  proc                    /proc                   proc    defaults        0 0
- Populate
/etc/resolv.conf - Populate
/etc/sysconfig/network
  NETWORKING=yes
  NOZEROCONF=yes
  HOSTNAME=tara.example.org
- Populate
/etc/sysconfig/network-scripts/ifcfg-eth0(use the correct values for IPs, prefixes and gateways)
  DEVICE=eth0
  BOOTPROTO=static
  IPADDR=192.168.0.100
  GATEWAY=192.168.0.1
  PREFIX=24
  ONBOOT=yes
- Populate
/boot/grub/grub.conf(mind the line break)
  default=0
  timeout=5
  title CentOS (2.6.32-220.23.1.el6.x86_64)
    root (hd0,0)
    kernel /vmlinuz-2.6.32-220.23.1.el6.x86_64 ro root=LABEL=lv_c6_root LANG=en_US.UTF-8 \
      SYSFONT=latarcyrheb-sun16 KEYBOARDTYPE=pc KEYTABLE=de-latin1-nodeadkeys
    initrd /initramfs-2.6.32-220.23.1.el6.x86_64.img
- populate
/root
cp /etc/skel/.* /root
- Create
grub.confsymlinks
  ln -s grub.conf /boot/grub/menu.lst
  ln -s /boot/grub/grub.conf /etc/grub.conf
- Leave the chroot
- Unmount the new system
umount /sysroot/{boot,sys,dev,proc,}
Now, usually this ought to result in a bootable system which can be accessed via SSH. Only one way to find out.
Saturday, March 17. 2012
Manually converting a Cisco AP to LAP mode
Several of Cisco Systems Wireless Access Points can be used in two different deployment scenarios:
- As standalone APs (or Thick APs)
- As lightweight APs (or Thin APs/LAPs) connected to a wireless LAN controller (or WLC)
Each scenario requires special software on the AP. Converting a Thin AP to Thick is comparatively easy, as this can be done from the WLC the AP is managed by.
Converting in the other direction (Thick to Thin) is a bit more complicated. It requires a so called LWAPP Upgrade and Recovery image to be installed on the AP, along with some configuration changes. Equipped with this image the AP will be able to find and associate with a WLC, which will then provide the AP with the "real" LAP IOS version and appropriate config.
Getting the LWAPP Upgrade image onto the AP can be a bit tricky, though. Cisco offers a tool to help with the process (the Autonomous To Lightweight Mode Upgrade Tool), but this has several drawbacks.
- It requires Microsoft Windows
- It comes with it's own TFTP server that does not play nice with other TFTP software
- It is a rather finicky piece of software
The latter is, of course, entirely subjective.
But there is not much magic in what this tool does, anyway. Converting a Thick AP to Thin mode can be done completly manually. The following is required:
- A Cisco AP that can be converted to LAP mode. Not all can, check the documentation
- A copy of the LWAPP Upgrade and Recovery image. Available on the Cisco website download section alongside the software for Thick APs. Access to this requires a Cisco support contract.
- A way to transfer this image to the AP. This usually means a TFTP server that the AP can reach.
- Connectivity to the AP. This procedure can be done remotely (via telnet or SSH), but a serial console connection works, of course. Do not use this procedure if the connection to the AP uses the wireless interface of the AP you want to convert.
Please note:
Following this procedure the AP will reboot without a config. It's expected that the AP will be able to acquire an IP address on it's ethernet port via DHCP and establish a connection to a WLC. The AP will not be remotely manageable unless it is able to associate with a WLC. Keep this in mind before converting an AP in Australia from Europe.
Convertion
The convertion consists of three main steps:
- Creating a self signed certificate for the AP
- Install a number of trusted root certificates
- Install the LWAPP Upgrade software
Self signed certificate
Connect to the AP and make sure you have the appropriate privileges:
ap#sh privilege
Current privilege level is 15
The self signed certificate will contain the MAC address of the ethernet interface, so this needs to be determined first.
ap#show int F0 | include address
  Hardware is PowerPC405GP Ethernet, address is 0014.6a40.45ab (bia 0014.6a40.45ab)
Next, some boot parameters need to be set, as well as the clock of the AP. This is necessary for the creation of the self signed certificate as well as acceptance of the root certificates to be installed later.
ap# conf t
ap(config)# no boot manual
ap(config)# no boot enable-break
ap(config)# no sntp broadcast client
ap(config)# no timezone
ap(config)# end
ap# clock set 17:36:00 17 March 2012
Next, eventually existing versions of the self signed certificate (SSC) will be removed. These do not necessarily exist, so getting an error message here denoting this is not critical. Confirmation is required if the keys actually do exist.
Afterwards, a new RSA keypair is generated, and a SSC based on this keypair. The common name (cn) entered in the certificate subject name consists of the AP family description (C1200 for a 1242AG, for example) and the MAC address of the ethernet interface as determined above. The other fields of the subject name are static.
ap# conf t
ap(config)# crypto key zeroize rsa CISCO_IOS_SSC_Keys
% The specified RSA keypair does not exist (CISCO_IOS_SSC_Keys).
ap(config)# no crypto ca trustpoint CISCO_IOS_SSC_Cert
% CA trustpoint 'CISCO_IOS_SSC_Cert' is not known.
ap(config)# crypto key generate rsa general-keys label CISCO_IOS_SSC_Keys modulus 2048
The name for the keys will be: CISCO_IOS_SSC_Keys
% The key modulus size is 2048 bits
% Generating 2048 bit RSA keys ...[OK]
ap(config)# crypto ca trustpoint CISCO_IOS_SSC_Cert
ap(ca-trustpoint)#enrollment selfsigned
ap(ca-trustpoint)#serial-number none
ap(ca-trustpoint)#fqdn none
ap(ca-trustpoint)#ip-address none
ap(ca-trustpoint)#subject-name cn=C1200-00146a4045ab, ea=support@cisco.com, o=Cisco Systems, C=US, ST=California, L=San Jose
ap(ca-trustpoint)#revocation-check none
ap(ca-trustpoint)#rsakeypair CISCO_IOS_SSC_Keys
ap(ca-trustpoint)#exit
ap(config)#crypto ca enroll CISCO_IOS_SSC_Cert
% The fully-qualified domain name will not be included in the certificate
Generate Self Signed Router Certificate? [yes/no]: yes
Router Self Signed Certificate successfully created
Root certificates
Some root and intermediate certificates need to be installed on the AP. There are several of these, owing to the history of the WLC. Again, an error during certificate removal stating that the certificate does not exist is not fatal. Confirm the removal if prompted so.
ap# conf t
ap(config)#no crypto ca trustpoint airespace-new-root-cert
% CA trustpoint 'airespace-new-root-cert' is not known.
ap(config)#no crypto ca trustpoint airespace-device-root-cert
% CA trustpoint 'airespace-device-root-cert' is not known.
ap(config)#no crypto ca trustpoint airespace-old-root-cert
% CA trustpoint 'airespace-old-root-cert' is not known.
ap(config)#no crypto ca trustpoint cisco-root-cert
% CA trustpoint 'cisco-root-cert' is not known.
ap(config)#no crypto ca trustpoint cisco-mfg-root-cert
% CA trustpoint 'cisco-mfg-root-cert' is not known.
ap(config)#crypto ca profile enrollment Cisco_IOS_profile
ap(ca-profile-enroll)#authentication terminal
ap(ca-profile-enroll)#enrollment terminal
ap(ca-profile-enroll)#exit
ap(config)#crypto ca trustpoint airespace-new-root-cert
ap(ca-trustpoint)#enrollment profile Cisco_IOS_profile
ap(ca-trustpoint)#revocation-check none
ap(ca-trustpoint)#exit
ap(config)#crypto ca trustpoint airespace-device-root-cert
ap(ca-trustpoint)#enrollment profile Cisco_IOS_profile
ap(ca-trustpoint)#revocation-check none
ap(ca-trustpoint)#exit
ap(config)#crypto ca trustpoint airespace-old-root-cert
ap(ca-trustpoint)#enrollment profile Cisco_IOS_profile
ap(ca-trustpoint)#revocation-check none
ap(ca-trustpoint)#exit
ap(config)#crypto ca trustpoint cisco-root-cert
ap(ca-trustpoint)#enrollment profile Cisco_IOS_profile
ap(ca-trustpoint)#revocation-check none
ap(ca-trustpoint)#exit
ap(config)#crypto ca trustpoint cisco-mfg-root-cert
ap(ca-trustpoint)#enrollment profile Cisco_IOS_profile
ap(ca-trustpoint)#revocation-check none
ap(ca-trustpoint)#exit
Next, import the certificates.
airespace-new-root-cert:
ap(config)#crypto ca authen airespace-new-root-cert
Enter the base 64 encoded CA certificate.
End with a blank line or the word "quit" on a line by itself
-----BEGIN CERTIFICATE-----
MIIEWjCCA4OgAwIBAgIBADANBgkqhkiG9w0BAQQFADCBpjELMAkGA1UEBhMCVVMx
EzARBgNVBAgTCkNhbGlmb3JuaWExETAPBgNVBAcTCFNhbiBKb3NlMRcwFQYDVQQK
Ew5BaXJlc3BhY2UgSW5jLjEUMBIGA1UECxMLRW5naW5lZXJpbmcxGjAYBgNVBAMT
EUFpcmVzcGFjZSBSb290IENBMSQwIgYJKoZIhvcNAQkBFhVzdXBwb3J0QGFpcmVz
cGFjZS5jb20wHhcNMDMwNzMxMTM0MTIyWhcNMTMwNDI5MTM0MTIyWjCBpjELMAkG
A1UEBhMCVVMxEzARBgNVBAgTCkNhbGlmb3JuaWExETAPBgNVBAcTCFNhbiBKb3Nl
MRcwFQYDVQQKEw5BaXJlc3BhY2UgSW5jLjEUMBIGA1UECxMLRW5naW5lZXJpbmcx
GjAYBgNVBAMTEUFpcmVzcGFjZSBSb290IENBMSQwIgYJKoZIhvcNAQkBFhVzdXBw
b3J0QGFpcmVzcGFjZS5jb20wgd8wDQYJKoZIhvcNAQEBBQADgc0AMIHJAoHBAMyg
+SMwvUnpR6Q/oqzzpIJ/Zne7ZvRrFja6hO8JZpzK4OrKbx0PupD++li4UCwQ/Hjc
ydEm2I8q0Fmoppv+kDJL1kVTztkTG5mwKCpz2YZV769epUCWIuVLn8QliYh48aUf
9HsW8gwKN6NSYDpasNxFM7DAt8gC3yXwWF3/X0P9rh9Io0vf+ArCfjC+kxvTSQre
yB/2+ZdPFAhVyIE/0zTxuKGJKwoQ2YpEfb8hPmRSDSDnjpMi2hHKekas60FGqwID
AQABo4IBFDCCARAwHQYDVR0OBBYEFFONg2BHjcIPgGYyMunhcHBVKxfqMIHTBgNV
HSMEgcswgciAFFONg2BHjcIPgGYyMunhcHBVKxfqoYGspIGpMIGmMQswCQYDVQQG
EwJVUzETMBEGA1UECBMKQ2FsaWZvcm5pYTERMA8GA1UEBxMIU2FuIEpvc2UxFzAV
BgNVBAoTDkFpcmVzcGFjZSBJbmMuMRQwEgYDVQQLEwtFbmdpbmVlcmluZzEaMBgG
A1UEAxMRQWlyZXNwYWNlIFJvb3QgQ0ExJDAiBgkqhkiG9w0BCQEWFXN1cHBvcnRA
YWlyZXNwYWNlLmNvbYIBADAMBgNVHRMEBTADAQH/MAsGA1UdDwQEAwIBBjANBgkq
hkiG9w0BAQQFAAOBwQAG42U9Sxn6oMO5jq4jxaMwXkJFIqlhvhtbiFbtLlrkL3rA
JqooBZgkCA0VEhabROQoRy67pXMp8HDbVgEce+nzokA5mjVXpQOE7KA1Pc9J6OwB
lAR0aQvBIHknZIc9JZQ9zWapcm9KeetAHHxol06SXYAjE8EmH2BHY6nZrB/fAJL2
V98atJuQTiLOVRXNRPaKAE4ryGH7wVQNwfOma4zdwcJ8RCAn5iQRmLDgAt6eBtZP
DVOJh5bBwNsSsPWBb+0=
-----END CERTIFICATE-----
quit
Certificate has the following attributes:
Fingerprint: C2176703 8D42BF7F 5240CAD3 F59930A9
% Do you accept this certificate? [yes/no]: yes
Trustpoint CA certificate accepted.
% Certificate successfully imported
airespace-device-root-cert:
ap(config)#crypto ca authen  airespace-device-root-cert
Enter the base 64 encoded CA certificate.
End with a blank line or the word "quit" on a line by itself
-----BEGIN CERTIFICATE-----
MIIEfzCCA6igAwIBAgIBAzANBgkqhkiG9w0BAQQFADCBpjELMAkGA1UEBhMCVVMx
EzARBgNVBAgTCkNhbGlmb3JuaWExETAPBgNVBAcTCFNhbiBKb3NlMRcwFQYDVQQK
Ew5BaXJlc3BhY2UgSW5jLjEUMBIGA1UECxMLRW5naW5lZXJpbmcxGjAYBgNVBAMT
EUFpcmVzcGFjZSBSb290IENBMSQwIgYJKoZIhvcNAQkBFhVzdXBwb3J0QGFpcmVz
cGFjZS5jb20wHhcNMDUwNDI4MjIzNzEzWhcNMTUwMTI2MjIzNzEzWjCBqDELMAkG
A1UEBhMCVVMxEzARBgNVBAgTCkNhbGlmb3JuaWExETAPBgNVBAcTCFNhbiBKb3Nl
MRcwFQYDVQQKEw5BaXJlc3BhY2UgSW5jLjEUMBIGA1UECxMLRW5naW5lZXJpbmcx
HDAaBgNVBAMTE0FpcmVzcGFjZSBEZXZpY2UgQ0ExJDAiBgkqhkiG9w0BCQEWFXN1
cHBvcnRAYWlyZXNwYWNlLmNvbTCB3zANBgkqhkiG9w0BAQEFAAOBzQAwgckCgcEA
qTwBWOcoTnX/hqV6iGrKN0ML7PB1gvVr22rFFFVPsG6qMns+zjyTkQPJO6QMCvky
pstdo/HDxShTv04ZLBv8SEZ+vZMGtJdKEnO/NYrYVA8mHmEromc7aNI5yH4enpZ7
JlTShUW7f3hfTp1Le4ABqi9FXP9FUuzbVmfj/OcJPgaPrjU9Qii0jYtBXZv0ljQt
wUWZh7ab+ktR+2e0oMIef8YmmjlH6x1IXoOxKYsHnl4e2rWgvl4d4BCf8L1HUOMr
AgMBAAGjggE3MIIBMzAMBgNVHRMEBTADAQH/MC4GCWCGSAGG+EIBDQQhFh9BaXJl
c3BhY2UgRGV2aWNlIENBIENlcnRpZmljYXRlMB0GA1UdDgQWBBQKUjuxJXBSO5zq
dH+yrT2Pleo/zDCB0wYDVR0jBIHLMIHIgBRTjYNgR43CD4BmMjLp4XBwVSsX6qGB
rKSBqTCBpjELMAkGA1UEBhMCVVMxEzARBgNVBAgTCkNhbGlmb3JuaWExETAPBgNV
BAcTCFNhbiBKb3NlMRcwFQYDVQQKEw5BaXJlc3BhY2UgSW5jLjEUMBIGA1UECxML
RW5naW5lZXJpbmcxGjAYBgNVBAMTEUFpcmVzcGFjZSBSb290IENBMSQwIgYJKoZI
hvcNAQkBFhVzdXBwb3J0QGFpcmVzcGFjZS5jb22CAQAwDQYJKoZIhvcNAQEEBQAD
gcEAoOjVnZvanu0MlgRd/qNwhOxZtcPTcWlNsHBmTgyAYNae42boH588z2iKsEmO
zPpspyhU8tgEZpDJj+yE7y9/DwjJD3GdwPTBJc7RtSVt2T5Rd3vV6H8dx5/MUC3C
AkLAXRaC3uPfdUG4xVtDPBDf4r/S6ALn2SMymiOiB2+GvMBI1Wmzg1msiXmX8CxV
b4/jGHVPYFxDzafIGEewhR2t8NbNYsjeqG5uEkp83L+m/MfhhSodsVKdY7NogwX2
e9Jf
-----END CERTIFICATE-----
quit
Certificate has the following attributes:
Fingerprint: B5B0E363 7834493B DD640D72 122B19AC
Certificate validated - Signed by existing trustpoint CA certificate.
Trustpoint CA certificate accepted.
% Certificate successfully imported
airespace-old-root-cert:
ap(config)#crypto ca authen airespace-old-root-cert
Enter the base 64 encoded CA certificate.
End with a blank line or the word "quit" on a line by itself
-----BEGIN CERTIFICATE-----
MIIEBjCCAy+gAwIBAgIBADANBgkqhkiG9w0BAQQFADCBjzELMAkGA1UEBhMCVVMx
EzARBgNVBAgTCkNhbGlmb3JuaWExETAPBgNVBAcTCFNhbiBKb3NlMRYwFAYDVQQK
Ew1haXJlc3BhY2UgSW5jMQ0wCwYDVQQLEwRub25lMQswCQYDVQQDEwJjYTEkMCIG
CSqGSIb3DQEJARYVc3VwcG9ydEBhaXJlc3BhY2UuY29tMB4XDTAzMDIxMjIzMzg1
NVoXDTEyMTExMTIzMzg1NVowgY8xCzAJBgNVBAYTAlVTMRMwEQYDVQQIEwpDYWxp
Zm9ybmlhMREwDwYDVQQHEwhTYW4gSm9zZTEWMBQGA1UEChMNYWlyZXNwYWNlIElu
YzENMAsGA1UECxMEbm9uZTELMAkGA1UEAxMCY2ExJDAiBgkqhkiG9w0BCQEWFXN1
cHBvcnRAYWlyZXNwYWNlLmNvbTCB3zANBgkqhkiG9w0BAQEFAAOBzQAwgckCgcEA
2505ATAFndEFyyeTm5kH+B/1f6kkBlv3Glhl+LnPzLNnk1TUabq4RxyjJ67qAGqs
kEecncI7Z976zA0oMsYQP6WcQeLotCULTSkD61JimpnWGLdHxKlBURq5lbsUkFQE
X0oLn/OH80bV86JJKu0baj3WOdhJJDZqEjTdLbE81Il+LqEBY7zMgi96bQszq1cF
PHhKbaPdHluWz1TGz01ZvBv9bLbnL8spiNy+bU12+4Mfr1aD5OIIIgCp6y477w35
AgMBAAGjge8wgewwHQYDVR0OBBYEFJRX330Ugi0xuyh3LomWGIbaRoS6MIG8BgNV
HSMEgbQwgbGAFJRX330Ugi0xuyh3LomWGIbaRoS6oYGVpIGSMIGPMQswCQYDVQQG
EwJVUzETMBEGA1UECBMKQ2FsaWZvcm5pYTERMA8GA1UEBxMIU2FuIEpvc2UxFjAU
BgNVBAoTDWFpcmVzcGFjZSBJbmMxDTALBgNVBAsTBG5vbmUxCzAJBgNVBAMTAmNh
MSQwIgYJKoZIhvcNAQkBFhVzdXBwb3J0QGFpcmVzcGFjZS5jb22CAQAwDAYDVR0T
BAUwAwEB/zANBgkqhkiG9w0BAQQFAAOBwQCusDSdwPkqqjpXdbOnnFQhqdAVOJJh
lcA0eQTagdQSD1j64imSI761SpBtcPf3IZLvr6Sw9IhgTjCUu8x3o2CogSkISbh7
XKGqFyGSKlVraODTGtxyZMTE1rIzNFyGJU5JiAlmRc1A8Sdhi8N+cdrZFnclMiNh
cdh6Fvkq98FRy4iSRDvGZlm+pHuYXohmaKHr1Ii79uepSf34dxHVGKgOID2hK+vc
aWPtp7dgeaMiOAyWDLjTJMrdlJ3qOeDvAz0=
-----END CERTIFICATE-----
quit
Certificate has the following attributes:
Fingerprint: 61FD1452 D2803ADC BC4D069C 5FC3C92E
% Do you accept this certificate? [yes/no]: yes
Trustpoint CA certificate accepted.
% Certificate successfully imported
cisco-mfg-root-cert:
ap(config)#crypto ca authen cisco-mfg-root-cert
Enter the base 64 encoded CA certificate.
End with a blank line or the word "quit" on a line by itself
-----BEGIN CERTIFICATE-----
MIIE2TCCA8GgAwIBAgIKamlnswAAAAAAAzANBgkqhkiG9w0BAQUFADA1MRYwFAYD
VQQKEw1DaXNjbyBTeXN0ZW1zMRswGQYDVQQDExJDaXNjbyBSb290IENBIDIwNDgw
HhcNMDUwNjEwMjIxNjAxWhcNMjkwNTE0MjAyNTQyWjA5MRYwFAYDVQQKEw1DaXNj
byBTeXN0ZW1zMR8wHQYDVQQDExZDaXNjbyBNYW51ZmFjdHVyaW5nIENBMIIBIDAN
BgkqhkiG9w0BAQEFAAOCAQ0AMIIBCAKCAQEAoMX33JaUNRXx9JlOu5tB4X3beRaR
u/NU8kFKlDJiYskj95rnu5t56AcpTjD1rhvFIVZGsPj05o6BuBbMqJuF0kKB23zL
lKkRYRIcXOozIByaFqd925kGauI2r+z4Cv+YZwf0MO6l+IgaqujHPBzO7kj9zVw3
8YaTnj1xdX007ksUqcApewUQ74eeaTEw9Ug2P9irzhXi6FifPmJxBIcmpBViASWq
1d/JyVu4yaEHe75okpOTIKhsvRV100RdRUvsqNpgx9jI1cjtQeH1X1eOUzKTSdXZ
D/g2qgfEMkHFp68dGf/2c5k5WnNnYhM0DR9elXBSZBcG7FNcXNtq6jUAQQIBA6OC
AecwggHjMBIGA1UdEwEB/wQIMAYBAf8CAQAwHQYDVR0OBBYEFNDFIiarT0Zg7K4F
kcfcWtGwR/dsMAsGA1UdDwQEAwIBhjAQBgkrBgEEAYI3FQEEAwIBADAZBgkrBgEE
AYI3FAIEDB4KAFMAdQBiAEMAQTAfBgNVHSMEGDAWgBQn88gVHm6aAgkWrSugiWBf
2nsvqjBDBgNVHR8EPDA6MDigNqA0hjJodHRwOi8vd3d3LmNpc2NvLmNvbS9zZWN1
cml0eS9wa2kvY3JsL2NyY2EyMDQ4LmNybDBQBggrBgEFBQcBAQREMEIwQAYIKwYB
BQUHMAKGNGh0dHA6Ly93d3cuY2lzY28uY29tL3NlY3VyaXR5L3BraS9jZXJ0cy9j
cmNhMjA0OC5jZXIwXAYDVR0gBFUwUzBRBgorBgEEAQkVAQIAMEMwQQYIKwYBBQUH
AgEWNWh0dHA6Ly93d3cuY2lzY28uY29tL3NlY3VyaXR5L3BraS9wb2xpY2llcy9p
bmRleC5odG1sMF4GA1UdJQRXMFUGCCsGAQUFBwMBBggrBgEFBQcDAgYIKwYBBQUH
AwUGCCsGAQUFBwMGBggrBgEFBQcDBwYKKwYBBAGCNwoDAQYKKwYBBAGCNxQCAQYJ
KwYBBAGCNxUGMA0GCSqGSIb3DQEBBQUAA4IBAQAw8zAtjPLKN0pkmSQpCvKGqkLV
I+ii6itvaSN6go4cTAnPpE+rhC836WVg0ZrG2PML9d7QJwBcbx2RvdFOWFEdyeP3
OOfTC9Fovo4ipUsG4eakqjN9GnW6JvNwxmEApcN5JlunGdGTjaubEBEpH6GC/f08
S25l3JNFBemvM2tnIwcGhiLa69yHz1khQhrpz3B1iOAkPV19TpY4gJfVb/Cbcdi6
YBmlsGGGrd1lZva5J6LuL2GbuqEwYf2+rDUU+bgtlwavw+9tzD0865XpgdOKXrbO
+nmka9eiV2TEP0zJ2+iC7AFm1BCIolblPFft6QKoSJFjB6thJksaE5/k3Npf
-----END CERTIFICATE-----
quit
Trustpoint 'cisco-mfg-root-cert' is a subordinate CA and holds a non self signed cert
Certificate has the following attributes:
Fingerprint: 6EA241F5 AC9A1148 CC8B4B43 C7C13025
% Do you accept this certificate? [yes/no]: yes
Trustpoint CA certificate accepted.
% Certificate successfully imported
cisco-root-cert:
ap(config)# crypto ca authen cisco-root-cert
Enter the base 64 encoded CA certificate.
End with a blank line or the word "quit" on a line by itself
-----BEGIN CERTIFICATE-----
MIIDQzCCAiugAwIBAgIQX/h7KCtU3I1CoxW1aMmt/zANBgkqhkiG9w0BAQUFADA1
MRYwFAYDVQQKEw1DaXNjbyBTeXN0ZW1zMRswGQYDVQQDExJDaXNjbyBSb290IENB
IDIwNDgwHhcNMDQwNTE0MjAxNzEyWhcNMjkwNTE0MjAyNTQyWjA1MRYwFAYDVQQK
Ew1DaXNjbyBTeXN0ZW1zMRswGQYDVQQDExJDaXNjbyBSb290IENBIDIwNDgwggEg
MA0GCSqGSIb3DQEBAQUAA4IBDQAwggEIAoIBAQCwmrmrp68Kd6ficba0ZmKUeIhH
xmJVhEAyv8CrLqUccda8bnuoqrpu0hWISEWdovyD0My5jOAmaHBKeN8hF570YQXJ
FcjPFto1YYmUQ6iEqDGYeJu5Tm8sUxJszR2tKyS7McQr/4NEb7Y9JHcJ6r8qqB9q
VvYgDxFUl4F1pyXOWWqCZe+36ufijXWLbvLdT6ZeYpzPEApk0E5tzivMW/VgpSdH
jWn0f84bcN5wGyDWbs2mAag8EtKpP6BrXruOIIt6keO1aO6g58QBdKhTCytKmg9l
Eg6CTY5j/e/rmxrbU6YTYK/CfdfHbBcl1HP7R2RQgYCUTOG/rksc35LtLgXfAgED
o1EwTzALBgNVHQ8EBAMCAYYwDwYDVR0TAQH/BAUwAwEB/zAdBgNVHQ4EFgQUJ/PI
FR5umgIJFq0roIlgX9p7L6owEAYJKwYBBAGCNxUBBAMCAQAwDQYJKoZIhvcNAQEF
BQADggEBAJ2dhISjQal8dwy3U8pORFBi71R803UXHOjgxkhLtv5MOhmBVrBW7hmW
Yqpao2TB9k5UM8Z3/sUcuuVdJcr18JOagxEu5sv4dEX+5wW4q+ffy0vhN4TauYuX
cB7w4ovXsNgOnbFp1iqRe6lJT37mjpXYgyc81WhJDtSd9i7rp77rMKSsH0T8lasz
Bvt9YAretIpjsJyp8qS5UwGH0GikJ3+r/+n6yUA4iGe0OcaEb1fJU9u6ju7AQ7L4
CYNu/2bPPu8Xs1gYJQk0XuPL1hS27PKSb3TkL4Eq1ZKR4OCXPDJoBYVL0fdX4lId
kxpUnwVwwEpxYB5DC2Ae/qPOgRnhCzU=
-----END CERTIFICATE-----
quit
Certificate has the following attributes:
Fingerprint: BE395ABE 078AB112 1725CC1D 46343CB2
% Do you accept this certificate? [yes/no]: yes
Trustpoint CA certificate accepted.
% Certificate successfully imported
Image transfer
The LWAPP Upgrade image is transferred to the AP. This will overwrite any existing images, thus this is the point of no return, in a way. Enter the appropriate data for your environment (IP address, image name) in the TFTP server section.
ap# arch down /over /create-space tftp://10.200.254.4/images/c1200-rcvk9w8-tar.123-7.JX9.tar
examining image...
Loading images/c1200-rcvk9w8-tar.123-7.JX9.tar from 10.200.254.4 (via BVI1): !
extracting info (273 bytes)
Image info:
    Version Suffix: rcvk9w8-
    Image Name: c1200-rcvk9w8-mx
    Version Directory: c1200-rcvk9w8-mx
    Ios Image Size: 1751552
    Total Image Size: 1751552
    Image Feature: WIRELESS LAN|LWAPP|RECOVERY
    Image Family: C1200
    Wireless Switch Management Version: 3.0.51.0
Extracting files...
c1200-rcvk9w8-mx/ (directory) 0 (bytes)
extracting c1200-rcvk9w8-mx/c1200-rcvk9w8-mx (1741240 bytes)!!!!!!!!!
extracting c1200-rcvk9w8-mx/info (273 bytes)
extracting info.ver (273 bytes)!!
[OK - 1751040 bytes]
Deleting current version...
Deleting flash:/c1200-k9w7-mx.123-8.JA2...done.
New software image installed in flash:/c1200-rcvk9w8-mx
Configuring system to use new image...done.archive download: takes 67 seconds
ap#show archive status
SUCCESS: Upgrade complete.
Now there is only one thing left to do: remove the startup-config, and reload the AP. On reload the AP will come up with the LAP software and start searching for a WLC to join.
ap# wr erase
Erasing the nvram filesystem will remove all configuration files! Continue? [confirm]
[OK]
ap# reload
Proceed with reload? [confirm]
Sunday, August 21. 2011
Installing RedHat 1.1 (Mother's Day + 0.1)
Just to see what life was like in the dark ages of Linux distributions I ventured to install the earliest RedHat release I could get my hands on in a QEMU virtual machine.
It turns out that this is easier said than done. RedHat does have an archive of old versions (available at http://archive.download.redhat.com), but this is quite incomplete for the earliest version.
Fortunately there's an installable version of Mother's Day 1.1 on ibiblio (the 1.0 release is incomplete as well), which I used.
To make an installable version out of this it's recommened to make a local copy of the complete tree, which is easily done with rsync:
$ rsync -rv --progress www.ibiblio.org::pub/historic-linux/distributions/redhat/mothers-day-1.1 .
This will create a local directory called mothers-day-1.1 containing all needed files, taking up about 360MB.
The installer will need to access the files via a CDROM or a NFS share. I opted for the CD method, so let's create a CD image:
$ chmod +x mothers-day-1.1/bin/*
$ mkisofs -J -R -o mothers-day-1.1.iso mothers-day-1.1
This makes all the files in mothers-day-1.1/bin executable (this is important because the installer will mount the CD and expects to be able to execute these files for the installation) and creates an ISO image called mothers-day-1.1.iso containing all files from the mothers-day-1.1 directory.
The installer will boot from a floppy disk. The release contains a whole bunch of these, for different hardware configurations (a kernel containing all supported configs would not have fitted on one floppy, so one has to choose the right one). For QEMU we'll need standard IDE support (easy) and AMD PCnet support for networking (also easy). The boot image supporting these is located in mothers-day-1.1/images/1211/boot0066.img. These images were meant to be copied to a 1.44MB floppy disk, but the images are only 800k in size. If the images are passed to QEMU as they are QEMU will misinterpret the floppy size, causing the boot loader (LILO) to fail. So QEMU needs a little hint.
$ cp mothers-day-1.1/images/1211/boot0066.img boot.img
$ qemu-img resize boot.img 1440k
Image resized
$ cp mothers-day-1.1/images/rootdisk.img .
This copies the correct boot image to boot.img and resizes it to the correct size for a 1.44MB floppy. For convinience I also copied the root image disk, too. This disk already has the correct size.
All that's missing now is a hard disk image to install to. This should not be too large, as the IDE driver in the kernel has some problems handling this. Fortunately this is the deep past, so 768MB will be plenty.
$ qemu-img create -f qcow2 disk1.img 768MB
Deep past or not, the installer needs memory, and an amazing (for the time) amount of it. 4MB will not be enough, 8MB will do fine. So, let's go.
$ qemu -M pc -m 8 -fda boot.img -drive file=disk1.img,if=ide,media=disk,cache=writeback \
-cdrom mothers-day-1.1.iso -net nic,model=pcnet -net user -boot a
(This adds the hard disk image in writeback cache mode. This is not recommended from a data security standpoint, as data written by the virtual machine is not immediately committed to host storage, but since this is just a for fun exercise and EXT2 formatting takes ages with the default cache strategy I'll pass on data security here)
At the LILO prompt, just press Enter to boot with default options. When prompted, change the floppy to the root disk (change floppy0 rootdisk.img in the QEMU monitor mode) and press Enter to continue. The installer will come up (which is quite nice), prompting to change the floppy back to the boot floppy.
Select an Express install, say "No" to the default package list question, and select CD as the install media. The installer ought to find the CD image on /dev/hdc, which is correct.
There will be no OS/2 on this install, so skip the reboot at the next question.
The hard disk will need to be partitioned. The installer should find a hard disk at /dev/hda (if the installer just presents a list of partitioning programs without a disk device your hard disk image is too large). Partition the disk into one data partition (taking most of the space) and a small swap partition (16MB or so). The installer will ask to reboot if partitions were changed, this is not needed as there were no partitions on the disk to start with.
Confirm /dev/hda2 as a swap partition, and select /dev/hda1 for formatting.
On the package selection screen select whatever needed (or just everything, it does not really matter :) I'd recommend at least the Net Utils, everything X and Utils+. And there's Doom (but more on that later).
When asked for the type of video card select SVGA, and enter a hostname for the machine.
The installer will then format swap and file system, which might take a few seconds. Or even minutes. If you did not change the default caching strategy in the QEMU call above it will definitely take minutes. Or hours.
After the formatting the package installation phase begins. This will also take a few minutes, but at least it has a progress bar. The installer may complain about XF86_SVGA being already installed in the end, this can be ignored.
Then the boot kernel is copied from the boot floppy.
For the mouse, select microsoft-serial, connected to /dev/ttyS0.
The X configuration is a bit wonky (and this would not really change for the next decade or more). Decline autoprobe, select clgd5434 as the chipset (this isn't correct, but close enough). Enter 4096k of video memory, 10-100 for the clocks, and select the Generic Multisync monitor. The configurator will tell you that it failed after that, but never mind.
Configure networking, entering a host name, domain name and fully qualified host name. Select 10.0.2.100 as the IP, 10.0.2.0 as the network, 255.255.255.0 as the netmask, 10.0.2.255 as the broadcast, 10.0.2.2 as the gateway and 10.0.2.3 as the DNS server (QEMU user mode networking is funny).
Select no modem, your keymap, local time and your time zone (the list is sorted upside down, for whatever reason).
Select to install LILO in /dev/hda without specific parameters and without other operating systems.
Create a user account (if you want) and select a root password.
After that, the installation is finished. Select reboot.
The system will be unable to actually reboot, so stop QEMU after the installer has terminated and start it again:
$ qemu -M pc -m 8 -drive file=disk1.img,if=ide,media=disk -net nic,model=pcnet -net user -serial msmouse
This invocation is missing the floppy and CD images (they are not needed anymore) and adds a serial mouse.
At the boot prompt press Enter, and wait until the system has bootet to the login prompt (which will take all of a few seconds). Look around. If you're used to RedHat based systems (or Fedora) most things should look familiar.
Next up: getting X to actually work.
Tuesday, July 19. 2011
GIT pushing to a new bare remote repo
Just a note to myself, as I do not do this often enough to remember.
If you have a local GIT repository (which has no remote so far, as it was only used for local development so far) and want to push it out to a remote repository, and make that repository the default for push and pull operations, here is how it's done.
This requires GIT 1.7, and assumes the following:
- The local branch tobe pushed is
master - The remote repo is accessible via
ssh://user@example.com/GIT/project.gitand already contains a freshly created, bare repo
First, add a remote to the local repository.
$ git remote add origin ssh://user@example.com/GIT/project.git
This, by itself, does not do exacly much except to add a remote repository to your local repo config. The remote repo is called origin, which is the default name git chooses if you git clone from a remote repo. The remote repo is not associated with any local branches yet.
Second, push the accumulated local commits to the remote repo, designating the remote as the default for future push/pull operations.
$ git push --set-upstream origin master
This will push the local master branch to the remote origin, creating a master branch there as well, and ties origin to the local master branch as the default for push and pull. Future git pull and git push will work without any specifications of local or remote branches.
Sunday, March 21. 2010
Building a multi OS USB boot stick, Part 1 (Windows)
Among the things I carry around is always a collection of USB sticks, for various purposes. One of those is usually dedicated to a Linux rescue system, in order to get somehow broken systems back on their feet.
While it is possible these days to access non Linux systems from a booted Linux system any repair work beyond simple text file editing and file copying usually requires OS specific tools to get the job done. Thus it would be nice not only to have a Linux rescue system at hand, but a Windows one as well. And Solaris, while we're at it. And possibly some more.
USB sticks are cheap, at least in this part of the world. 10EUR will get you 4GB off the shelf in almost any electronics store, a little more money will get you 8GB ordered online. So space is not really an issue.
Actually installing an operating system in a way that allows it to boot off a removable media requires some specific preparations and tools in each case. This means that a running instance of that specific OS is needed to prepare the installation. This means that to get Windows to boot of an USB stick a running Windows installation is needed. The same goes for Solaris and Linux.
Preparations
The USB stick used for this exercise is a 4G Sandisk. This procedure will delete all data currently on the stick, so either make sure there is nothing of any interest on it, or just get a new one.
The initial plan is to have Windows, Linux and Solaris boot off the stick. Each OS will get it's own partition, to keep possible clashes between the files of each system to a minimum (and because Solaris wants and UFS partition, but more on that later).
Installing Windows on USB
The standard Windows installer does not allow for installation on USB devices. The standard tool for those tasks is BartPE, a free tool to create so-called Preinstalled Environments. Those are actually a Microsoft supported way to preinstall an operating system on a PC, which is used by system builders to deliver machines with the OS already installed but not registered. The Microsoft tools to create these environments are not easily available, though, and this is where BartPE came in a few years ago. It's original purpose was to create Live CDs of Windows, but booting from USB was added (experimentally) later.
While BartPE is a very valuable tool there is an even better one for this special purpose: The Ultimate Boot CD for Windows, which is basically a BartPE with a lot of useful tools already tacked to the side, and a completely reworked USB installer.
To use UBCD the following is needed:
- The UBCD installer, which weighs in at 255MB and is available from the projects site
- A Windows XP install CD (32 bit)
- Service Pack 3 for XP, if the Windows CD does not already include it
- A license for the Windows version (this is more a legal than a technical problem, but the Windows install on the USB stick needs a separate license to be legal)
- Drivers
The last point is especially interesting. UBCD will take all drivers whichare contained in the Windows XP install CD, which, as everyone knows who tried to install XP on a reasonably recent machine, is not exactly much. While the USB installed will boot (hopefully), access to hard disk drives on the machine or access to network interfaces may be severely limited due to missing drivers.
UBCD already comes with a largeish selection of updated drivers for mass storage, LAN and WLAN, so simply building an image with the default settings has a good chance of working on a large number of modern machines (although the WLAN drivers are disabled by default).
Install procedure
- Make a copy of the Windows XP CD (that is, just copy all the files on it into a folder on the hard disk drive)
- If the CD did not already contain a Windows copy patched to SP3 download the SP3 install package from Microsoft, and slipstream the Service Pack into the copied files
- Install UBDC
- Start UBCD and enter the path to the copied Windows CD in the first field
- Set Media Output to None
- Click "Build"
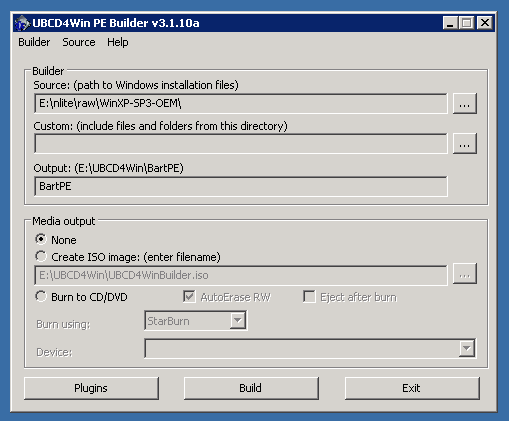
This will start a build process with the default settings, which are reasonable for a first build. UBCD is very customizable, most of the options are available by clicking the "Plugins" button on the main screen. Describing the various things that can be done here is beyond this text, but the UBCD home page has details on this.
After the build has finished plug in the USB stick and start ubusb.exe from the UBCD install folder. To make things easier make sure no other USB mass storage devices are connected. Set the options to match those in the screenshot below. Specifically:
- Make sure the right USB device is selected
- Set the partition size to 2048MB (or 2GB)
- Set the file system to FAT32-LBA
- Set the Boot Loader to grub4dos
- Select the right BartPE folder (although it should pick up the correct one automatically)
- Don't create a CD image

Clicking "Go" will start the process of repartitioning, formattingand copying of data to the USB stick. This may take a while.
After the process has finished (hopefully successful) the resulting USB stick can immediately be tested, because UBCD comes with a copy of qemu, which can emulate a PC. Just click the "Test USB" button, and a virtual PC will try to boot off the USB stick just created.
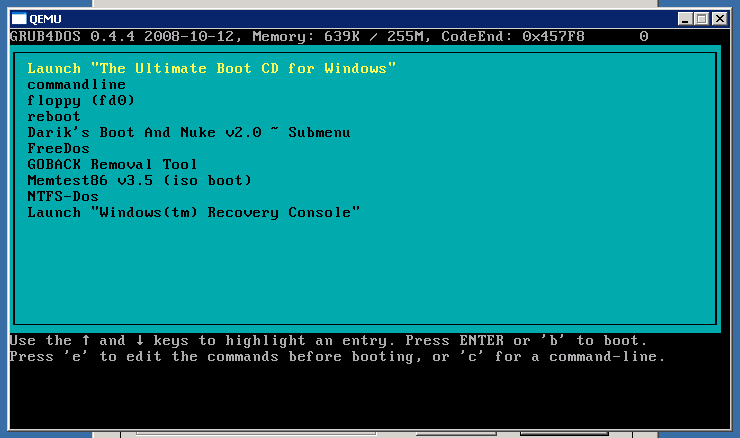
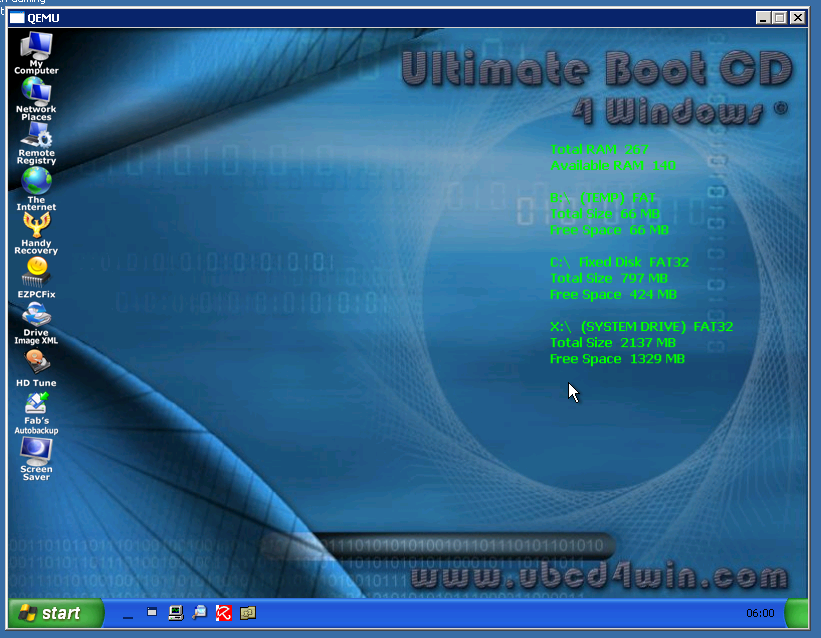
One down, two to go.
Outgoing TLS verification in exim
Exim is a mail server which suports TLS for encrypted connections. This is supported for incoming connections as well as outgoing connections.
The support for outgoing connections is a bit useless in it's default setting, though:
- If the remote server offers TLS exim will negotiate an encrypted connection, but will not verify the certificate, rendering the encryption somewhat useless
- If the remote side does not offer TLS mail will be sent in plain text.
All in all this is pretty useless from a security point of view. Making exim do the right thing requires some additions to the SMTP transport (the following is sufficient for the default exim configuration on CentOS" systems):
remote_smtp:
  driver = smtp
  hosts_require_tls = *
  tls_tempfail_tryclear = false
  tls_verify_certificates = /etc/pki/tls/certs
This forces exim to use TLS for every outgoing connection (hostsrequiretls = *), forbids fallback to clear text if TLS does not work, (tls_tempfail_tryclear = false) and points to a directory containing a trusted certificates (tls_verify_certificates = /etc/pki/tls/certs).
The last parameter is the main reason for this article, as it does not exactly do what it says on the tin. The exim in CentOS is built against OpenSSL, and the OpenSSL libraries are built with /etc/pki/tls/certs as the default search path for certificates. The documentation for the parameter says:
The value of this option must be the absolute path to a file containing permitted server certificates, for use when setting up an encrypted connection. Alternatively, if you are using OpenSSL, you can set tlsverifycertificates to the name of a directory containing certificate files. This does not work with GnuTLS; the option must be set to the name of a single file if you are using GnuTLS. The values of $host and $host_address are set to the name and address of the server during the expansion of this option. See chapter 39 for details of TLS.
The part missing from this is that the path set with tlsverifycertificates is searched in addition to the default certificate search path configured for OpenSSL. So if the OpenSSL default search path already contains all the certificates required, tlsverifycertificates must be set to force exim to verify the certificates, but the value it is set to does not matter. For security reasons it ought to be set to the default OpenSSL search path, though, to prevent someone from maliciously adding more trusted certificates.
PS: Doing this for a general purpose mail server is probably not a good idea, as many mail servers do not offer TLS, and even if they do, their certificate may not be signed by a trusted (by the client) certificate authority. The mail server in question here will only send mail to a single host.
Monday, January 18. 2010
Cisco VPN debugging by crystal ball
In the hope that google picks this up:
The problem space is a Cisco PIX terminating an IPSec VPN tunnel with a Checkpoint firewall on the other end. The tunnel does not work (the phase 2 setup fails). The Cisco logs the following debug messages:
ISAKMP (0): processing SA payload. message ID = 1911693629
ISAKMP : Checking IPSec proposal 1
ISAKMP: transform 1, ESP_3DES
ISAKMP:   attributes in transform:
ISAKMP:      SA life type in seconds
ISAKMP:      SA life duration (VPI) of  0x0 0x0 0xe 0x10
ISAKMP:      authenticator is HMAC-SHA
ISAKMP:      encaps is 1
ISAKMP (0): atts are acceptable.
ISAKMP : Checking IPSec proposal 1
ISAKMP (0): atts not acceptable. Next payload is 0
ISAKMP (0): SA not acceptable!
ISAKMP (0): sending NOTIFY message 14 protocol 0
return status is IKMP_ERR_NO_RETRANS
The log message above was created by an incoming proposal (the remote end proposed a connection to the Cisco PIX). This is useless and confusing at the same time. An IPSec proposal contains a list of parameters, sent by one end of the connection, specifying the parameters it is willing to use to establish a secure connection. This proposal specifies 3DES as the encryption algorithm, SHA as a hash function, and a lifetime for the connection of 3600 seconds (after which the connection has to be renegotiated).
As can be seen, the PIX accepts this proposal (as it should), since these parameters match those configured on the PIX for this connection. It then goes on to check the same proposal again, just to reject it this time.
The completely non-obvious solution to this is to disable compression (which the PIX does not support) on the Checkpoint. Why the PIX is unable to even give me a hexdump of the offending parameter in the proposal I'll probably never know.
Wednesday, December 30. 2009
Adding new dynamic library dependencies to an existing object
Due to some developing I needed a "lighttpd":http://www.lighttpd.net with modmagnet enabled. modmagnet is a module which allows inserting of lua code into the request processing stream. This is a cool feature, and I was pleased to see that
- lighttpd is on the standard Solaris install DVD
- mod_magnet is provided
Of course there is this small problem:
2009-12-29 23:29:31: (plugin.c.165) dlopen() failed for: /usr/lighttpd/1.4/lib/mod_magnet.soi
ld.so.1: lighttpd: fatal: relocation error: file /usr/lighttpd/1.4/lib/mod_magnet.so:
symbol luaL_checklstring: referenced symbol not found
What this means is that there are unresolved symbols remaining in the code after the dymanic loader has done it's work, which should not happen. Let's look a the dynamic deps of the module.
$ ldd /usr/lighttpd/1.4/lib/mod_magnet.so
        libsendfile.so.1 =>      /lib/libsendfile.so.1
        libm.so.2 =>     /lib/libm.so.2
        libresolv.so.2 =>        /lib/libresolv.so.2
        libnsl.so.1 =>   /lib/libnsl.so.1
        libsocket.so.1 =>        /lib/libsocket.so.1
        libc.so.1 =>     /lib/libc.so.1
        libmd.so.1 =>    /lib/libmd.so.1
        libmp.so.2 =>    /lib/libmp.so.2
        libscf.so.1 =>   /lib/libscf.so.1
        libuutil.so.1 =>         /lib/libuutil.so.1
        libgen.so.1 =>   /lib/libgen.so.1
        libsmbios.so.1 =>        /usr/lib/libsmbios.so.1
Judging from the name of the missing symbol luaL_checklstring it ought to come from some kind of lua library. But the listing above does not show any missing libraries, lest of all a lua one.
So what happened?
Somehow (and I have no idea how) Sun managed to build a mod_magnet without linking it to the lua libraries at the end. Simply speaking, this is broken.
Fortunately there is a way to fix this. Sun provides a utility called elfedit(1) which allows the editing of ELF file headers (like shared libraries). The lua library which provides the missing symbols is called liblua.so (no version information). The type of record in an ELF header which denotes the dynamic libraries needed is called DT_NEEDED. elfedit(1) takes two parameters: the file to edit, and the file into which to write the modified version.
First show the existing DT_NEEDED records.
$ elfedit mod_magnet.so mod_magnet2.so
> dyn:value DT_NEEDED
     index  tag                value
       [0]  NEEDED            0x5f9               libsendfile.so.1
       [1]  NEEDED            0x60a               libm.so.2
       [2]  NEEDED            0x614               libresolv.so.2
       [3]  NEEDED            0x623               libnsl.so.1
       [4]  NEEDED            0x62f               libsocket.so.1
       [5]  NEEDED            0x5d3               libc.so.1
This is basically the same list as above, with liblua.so notably lacking. Now add a new entry:
> dyn:value -add -s DT_NEEDED liblua.so
     index  tag                value
      [34]  NEEDED            0x63e               liblua.so
Now look at the new table, and save it.
> dyn:value DT_NEEDED
     index  tag                value
       [0]  NEEDED            0x5f9               libsendfile.so.1
       [1]  NEEDED            0x60a               libm.so.2
       [2]  NEEDED            0x614               libresolv.so.2
       [3]  NEEDED            0x623               libnsl.so.1
       [4]  NEEDED            0x62f               libsocket.so.1
       [5]  NEEDED            0x5d3               libc.so.1
      [34]  NEEDED            0x63e               liblua.so
> :write
> :quit
Looking at the ldd(1) output, just to be sure.
$ ldd ./mod_magnet2.so
        libsendfile.so.1 =>      /lib/libsendfile.so.1
        libm.so.2 =>     /lib/libm.so.2
        libresolv.so.2 =>        /lib/libresolv.so.2
        libnsl.so.1 =>   /lib/libnsl.so.1
        libsocket.so.1 =>        /lib/libsocket.so.1
        libc.so.1 =>     /lib/libc.so.1
        liblua.so =>     /usr/lib/liblua.so
        libmd.so.1 =>    /lib/libmd.so.1
        libmp.so.2 =>    /lib/libmp.so.2
        libscf.so.1 =>   /lib/libscf.so.1
        libdl.so.1 =>    /lib/libdl.so.1
        libuutil.so.1 =>         /lib/libuutil.so.1
        libgen.so.1 =>   /lib/libgen.so.1
        libsmbios.so.1 =>        /usr/lib/libsmbios.so.1
Now the linker picks up the lua libraries. If the modified modmagnet.so is now put back into /usr/lighttpd/1.4/lib, lighttpd will start and modmagnet will work.
Now, this wasn't so hard, was it?
Friday, December 25. 2009
Changing the rpool disk in Solaris
Ever since my storage system was built there was one thing that annoyed me. The 2.5" hard disk drive that houses the operating system itself was lifted from an old notebook and had the annoying property of parking it's heads after five seconds of inactivity. Since ZFS writes to the disk quite often and regularily this led to a constant cycle of parking and unparking. This was certainly not helping the disks life span, it made an annoying noise and it caused small system hangs whenever the disk had to unpark it's heads to read some data.
Under Linux one could use hdparm to instruct the disk to not park it's heads, but unfortunately a program mimicking this functionality seems to be absent under Solaris. Thus the plan to replace the disk with a different one which had a more sensible apporoach to head parking.
This turned out to be an interesting endeavour.
The general problem of replacing the disk holding the rpool is common enough that the excellent ZFS troubleshooting guide has a section on doing this. The general plan of action is as follows:
- Insert the replacement disk into an available slot
- Create a partition spanning the whole disk
- Create boot and data slices
- Attach the new disk as a mirror to the rpool
- Wait for the resilver to finish
- Install grub on the new disk
- Try to boot from the new disk
- Detach the old disk from the rpool
- Remove the old disk
This is all very sensible, and it all works as advertised. In my case there is, however, a last step not on the list above:
- Put the new disk on the controller the old disk was attached to
The reason for that is that the case I used only has one internal 2.5" hard disk drive slot. The new disk was prepared using an external USB-IDE converter module. This worked just fine, the BIOS is even able to boot from the USB disk. As long as the new disk remained attached to the USB converter everything was fine, even after the old (internal) disk was removed from the rpool. But putting the new disk into the case caused Solaris to roll over and die early in the boot process due to not finding it's rpool disk. The error message indicated that it was trying to read the pool from the external USB device (which no longer existed at this point).
Investigation (and much swearing) turned up that this information was passed by GRUB to the Solaris kernel.
Solaris uses a patched GRUB version which understands ZFS and has some string replacement magic built in. Every (non failsafe) boot entry contains a line similar to this:
kernel$ /platform/i86pc/kernel/$ISADIR/unix -B $ZFS-BOOTFS
$ZFS-BOOTFS is replaced by GRUB with the following information:
- The name of the root pool (usually rpool) and the number of the dataset that contains the root file system (there may be several BEs)
- The device path of the disk this GRUB instance was read from
The actual command line that is executed by GRUB thus looks something like this:
kernel /platform/i86pc/kernel/$ISADIR/unix -B zfs-bootfs=rpool/328 \
bootpath="/pci@0,0/pci8086,2942@1c,1/pci-ide@0/ide@0/cmdk@0,0:a"
The interesting part here is the bootpath parameter. This is the device that Solaris will try to mount the rpool from. Even if the rpool consists of several mirror devices, only one is used in the initial boot process. Where does GRUB get the device path from? It's read from the rpool header, from the disk GRUB was loaded from. Every ZFS pool disk contains the device path it was last found under. This usually does not matter much, a RAIDZ will still mount if you swap the disks around when the machine is off, but the boot process relies on the rpool disks not wandering around. My new disk still had the USB device path embedded, which GRUB read and passed to the kernel, which then failed to find the disk.
Fixing this turns out to be easy: boot into failsafe mode with the new disk on it's final connector. This will search for rpools and BEs on the system and offer to mount one of them. Pick the right one, reboot. This is enough to get the current (and correct) device path embedded into the rpool. The next (non failsafe) boot will thus pick up the correct device path and allow the boot to continue.
The morale of an afternoon thus spent in the innards of the Solaris boot process is thus: do not swap your rpool disk around.
Saturday, December 12. 2009
Creating a write only directory with SAMBA and ZFS
One of the intended uses of my OpenSolaris storage server was to serve as a "SAMBA":http://www.samba.org accessible data store. Part of that role was the wish to have an incoming directory modeled after similar directories found on many FTP servers. In detail this meant a share with the following properties:
- Readable for everyone (including unauthenticated users, i.e. guests)
- Everyone can create new files and directories on the share
- Only certain users can delete files and directories from the share
So everyone can add files to the share, but removing them requires special privileges.
It turns out that this is impossible to do with normal UNIX file system permissions, as for UNIX creating a file (which is a write operation on a directory) is much the same as deleting one (which is a write operation on a directory).
Fortunately OpenSolaris supports a much more powerful file operation permission language in the form of NFSv4 permissions.
It has been said that the NFSv4 permission system has been modeled after a smudged copy of the Windows NTFS permission system, and there is certainly merit to that claim, which is not a bad thing. The NTFS permission system is much more expressive than the standard UNIX system, as it has more actions (besides writing, reading and executing it also knows about deleting, for example), can support a large number of principals with different permissions and can actively deny an action (which is different from "not allowing").
h3. NFSv4 permissions
The NFSv4 system knows about the following actions:
|_. Action |_. Description for files |_. Description for directories | | read data | Read file contents | List directory contents | | write data | Write file contents (anywhere in the file) | Create new files | | execute | Execute file | Change into directory | | append | Append data to file | Create new directories | | delete | Delete the file | - | | delete child | - | Delete a file in the directory | | read/write attributes | Read/write basic attributes | (same as file) | | read/write xattrs | Read/write extended attributes | (same as file) | | read/write ACL | Read/write ACLs | (same as file) | | change owner | Change the owner | (same as file) | | sync | Use syncronous file access | - |
NFSv4 also contains a mechanism to specify actions that apply to a file or directory, and actions that are inherited to child objects of a directory (i.e. files or subdirectories). This allows very fine grained control of file system access.
Of special interest here are the bits about writing, appending and deleting files and folders.
The ACLs are maintained in a list of entries, each entry mapping a username/action pair to a verdict (allow/deny). Each access is matched against each entry in turn, and the verdict is taken from the first entry to match. So the order of entries is important.
Solaris' ls has two extensions to list those ACLs: -v for a verbose listing and -V for a concise listing. The format used by -V can be passed to chmod to change ACLs.
The permissions corresponding to the list of requirements stated above are as follows (/tank/share/incoming is the directory associated with the incoming share in smb.conf):
# ls -lVd /tank/share/incoming
drwxrwxrwx+  5 root     root           6 Dec 12 16:49 /tank/share/incoming
               user:sun:-w--dD--------:fdi----:allow
               user:sun:-w--dD--------:-------:allow
              everyone@:-w--dD--------:f-i----:deny
              everyone@:----dD--------:-di----:deny
              everyone@:----dD--------:-------:deny
              everyone@:rwxp--a-R-c--s:-di----:allow
              everyone@:r-xp--a-R-c--s:f-i----:allow
              everyone@:rwxp--a-R-c--s:-------:allow
#
There are two kinds of entries in this list. Those with an i in the second part of the action list and those without. The entries with an i are so called "inherit only" entries. They do not apply to the file or directory they are associated with, but are only inherited to new child entries. The other entries apply to the file/directory they are associated with.
This list can be read in three blocks:
The first block consists of the first two lines. The first line specifies that the right to delete files (d), delete child entries (D) and create new files/write file content (w) for the user named sun is inherited to new files and directories (fdi). This makes sure that this user can always remove files and directories, and overwrite existing file content in newly created files. The second line applies the same rights to the incoming directory itself.
The second block consists of lines 3 to 5 and contains only deny statements. They apply to everyone@, which means exactly what it says on the box. Lines 3 and 4 again deal with rights that are to be inherited to child objects, but the rights inherited to files and directories are different this time. Files inherit a deny to write anywhere in the file (w) and file deletion (dD). Directories just inherit the deletion part, otherwise new files could not be created in subdirectories (which needs the w right). The incoming directory itself gets the "no deletion" treatment as well.
The third block consists of the last three lines and restores some rights to non privileged users. Directories inherit the right to be read (r), changed though (x), new files and subdirectories can be created (rp), and attributes of all sorts can be read (aRc). We also allow synchronous file access (s). Files are much the same, except that the write anywhere right is missing. Not that it would matter much if that were allowed here, since it has been explicitly denied earlier. Note that the right to append to a file (p) is explicity allowed. The rights for the incoming directory itself (last line) again match those inherited to subdirectories.
Let's see if that works out.
$ id
uid=60003(smbnobody) gid=60003(smbnobody)
$ touch /tank/share/incoming/foo
$ ls -V /tank/share/incoming/foo
-r-xr-xr-x+  1 smbnobody   smbnobody         0 Dec 12 18:33 /tank/share/incoming/foo
               user:sun:-w--dD--------:------I:allow
              everyone@:-w--dD--------:------I:deny
              everyone@:r-xp--a-R-c--s:------I:allow
The unprivileged user smbnobody (SMB guest access is mapped to this uid) can create a new file in the incoming directory, and the file inherits the rights mentioned above (I signifies an inherited right).
$ cat /etc/passwd > /tank/share/incoming/foo
bash: /tank/share/incoming/foo: Permission denied
$ cat /etc/passwd >> /tank/share/incoming/foo
$
The user cannot overwrite the file (even though it is empty), but he can append to it.
$ rm /tank/share/incoming/foo
rm: /tank/share/incoming/foo: override protection 555 (yes/no)? y
rm: /tank/share/incoming/foo not removed: Permission denied
$
Deletion is also denied. Good.
$ id
uid=500(sun) gid=100(users)
$ cat /etc/passwd > /tank/share/incoming/foo
$ rm /tank/share/incoming/foo
$
However, the privileged user sun can overwrite and delete the file.
h3. Samba configuration
Samba also needs configuration to recognize and use the extended parmission system. The following is an excerpt from smb.conf, describing the incoming share:
[incoming]
        path = /tank/share/incoming
        writable = yes
        guest ok = yes
        browseable = yes
        public = yes
        acl check permissions = False
        ea support = yes
        store dos attributes = no
        map readonly = no
        map archive = no
        map system = no
        map hidden = no
        vfs objects = zfsacl
        nfs4: mode = simple
        nfs4: acedup = dontcare
This configures Samba to use extended ACLs using the ZFS (NFSv4) permission system.
Wednesday, December 2. 2009
Access problems with Apache server-status
Since I have twice now spent considerable time on debugging this:
If you have configured an Apache server-status handler, but retrieving the URL bound to this handler results in access denied even though there are no access restrictions configured on the container (bad idea, by the way), or the connecting IP is allowed access, make sure that the webserver can access it's document root.
This may seem obvious, but if the Apache is configured as a reverse proxy there may not be any files in the document root, because all content is created by the backend servers (or virtual handlers, like server-status). Nonetheless the Apache server must be able to change into the document root, or the virtual handlers will fail (reverse proxy access will work, however).
Wednesday, November 18. 2009
Resetting SATA devices under Linux
Note: this was tested only on SATA attached optical drives, not on hard disks. Removing a hard disk with mounted partitions on it (directly or indirectly) is probably not a very smart idea.
A device name of /dev/sr0 is assumed.
- Find out which controller the device is attached to (we'll need this later):
# readlink /sys/block/sr0
../devices/pci0000:00/0000:00:1f.2/host1/target1:0:0/1:0:0:0/block/sr0
The interesting part if the answer is host1, which identifies the controller.
- Disconnect the device
# echo 1 > /sys/block/sr0/device/delete
This will remove the device from the bus (logically). Look in dmesg for confirmation.
- Rescan the controller
# echo "- - -" > /sys/class/scsi_host/host1/scan
host1 is the identifier from step one. Again, dmesg should show the device being rediscovered.
Thursday, November 5. 2009
Manual IMAP
From time to time I am in the unfortunate situation of having to manually communicate with an IMAP server (in other words: reading mail via telnet).
Due to the nature of IMAP this is not remotely as simple as reading mail via telnet using the POP3 protocol, however, as IMAP is a very rich and powerful protocol with a quirky syntax.
As I tend to forget the commands for the most important tasks it might be a good idea to write them down.
Some definitions:
IMAP handles messages. Messages live in folders, which can have subfolders. Folders are separated by separators. Multiple groups of folders can exist, those groups are called namespaces. At least one namespace always exists. Within every folder each message has two identifiers (both are positive integers). The first (the sequence number) is valid only as long as the current folder is selected (or open, in other words), and ranges from 1 to N, N being the number of messages in the folder. The second (the UID) does not change from one selection to the next, and usually not between connects. Ideally, the UID for a message never changes once it has been assigned. The IMAP server is free to assign a new UID to a message, but it must tell the client if it does so.
Each request from a client starts with a tag, which is a group of characters consisting of letters, numbers and the dot ("."). The server reply consists of at least one line, but may consist of several. In the latter case, each line starts with an asterisk (*), except for the last, which starts with the tag chosen by the client. This signals the completion of the command. If the server reply is one lined, only the line starting with the client tag is sent. The client may reuse tags if it wishes. The protocol is not synchronous, the client can send several requests without waiting for the server to complete the preceding command.
Unless the client or the server indicate otherwise the default character set for IMAP is UTF7 (which, as long as you keep to the first 128 characters of the ASCII character set, is exactly the same as ASCII or UTF8).
Requests and replies consist of a space separated list of keywords and strings. Strings can be written in two forms, quoted and literal. Quoted strings can consist of any 7-bit-characters, except CR and LF, enclosed by ". If the quoted string contains the character " itself it
must be quoted as \".
Literal strings start with the number of characters in the string, enclosed by curly braces, and a CRLF. The string characters then follow.
That ought to be enough to make sense of the following:
h3. Login
Assuming the server supports plain text logins (indicated by AUTH=LOGIN in the server greeting:
$ telnet mailserver 143
[...]
* OK [CAPABILITY IMAP4 IMAP4rev1 LITERAL+ ID AUTH=LOGIN AUTH=PLAIN AUTH=CRAM-MD5 SASL-IR]
mailserver Cyrus IMAP4 v2.3.7-Invoca-RPM-2.3.7-7.el5_4.3 server ready
foo login user password
foo OK [CAPABILITY IMAP4 IMAP4rev1 LITERAL+ ID LOGINDISABLED ACL RIGHTS=kxte QUOTA MAILBOX-REFERRALS
NAMESPACE UIDPLUS NO_ATOMIC_RENAME UNSELECT CHILDREN MULTIAPPEND BINARY SORT SORT=MODSEQ
THREAD=ORDEREDSUBJECT THREAD=REFERENCES ANNOTATEMORE CATENATE CONDSTORE IDLE LISTEXT
LIST-SUBSCRIBED X-NETSCAPE URLAUTH] User logged in
In this example the login user name was user and the password was password. The tag chosen by the client (i.e. the person using telnet) was foo, which was echoed by the server in the login response. From now on the tag used will be the dot ("."), unless specified otherwise.
h3. Namespaces
Several groups of folders can exists, these groups are called namespaces. One use is the implementation of shared folders such that the private folders of a user live in one namespace, and the shared folders in another. To list the available namespaces:
. NAMESPACE
* NAMESPACE (("INBOX." ".")) (("user." ".")) (("" "."))
. OK Completed
This user has access to three namespaces: INBOX, user and a namespace without a name. The latter is the default name space. The dot (".") after the name is the separator used in this namespace.
h3. Listing folders
Listing folders within a namespace requires the namespace to be listed, and a pattern describing the required names. The pattern supports wildcards, especially "*" (list subfolders, recursively) and "%" (list subfolders, not recursively).
. LIST "" "INBOX.%"
* LIST (\HasNoChildren) "." "INBOX.Folder1"
* LIST (\HasNoChildren) "." "INBOX.Folder2"
* LIST (\HasChildren) "." "INBOX.Folder3"
. OK Completed
This INBOX folder has three subfolders: Folder1 and Folder2, both of which have no subfolders, as indicated by the \HasNoChildren flag, and one (Folder3) which has. Because of the "%" wildcard the subfolders of Folder3 are not shown in this listing.
In general, it is usually not a good idea to list folders using "*". This may return a list containing potentially thousands of folders (think of systems redistributing Usenet news via IMAP). Instead use "%" to descend the folders considered interesting.
h3. Selecting folders
In order to read messages the folder containing those must be activated first. This requires the full folder name as returned by LIST.
. SELECT "INBOX"
* FLAGS (\Answered \Flagged \Draft \Deleted \Seen NonJunk Junk $NotJunk $Junk $Forwarded)
* OK [PERMANENTFLAGS (\Answered \Flagged \Draft \Deleted \Seen NonJunk Junk $NotJunk $Junk $Forwarded \*)]
* 5966 EXISTS
* 0 RECENT
* OK [UIDVALIDITY 1136990532]
* OK [UIDNEXT 12498]
* OK [NOMODSEQ] Sorry, modsequences have not been enabled on this mailbox
. OK [READ-WRITE] Completed
This folder contains 5966 messages (5966 EXISTS), zero of which are unread (0 RECENT). The UIDVALIDITY parameter is an integer describing the validity of the UID numbers assigned to the messages. As long as this number does not change the mapping from message to UID has not changed.
h3. Finding messages
Unlike POP3 IMAP servers actually try to parse the messages stored in the folders in order to extract some information from the headers, such as sender address, recipient address, messageid and general message structure (such as attachments). The reason and upshot of this is that the server can search for messages having certain properties (for example, all messages by a certain sender) without having the client download all messages and doing the search itself. There are two search commands (SEARCH and UID SEARCH) which differ in the results they return. The first command returns sequence numbers, the second returns message UIDs.
Multiple search conditions can be used in one search request, those are ANDed (i.e., all have to be satisfied).
A small table of possible search conditions:
|_. Query |_. Looking for |_. Example |
| FROM " | Mail from that sender | FROM "user@example.org" |
| TO " | Mail to that recipient | TO "user@example.org" |
| SINCE | Mail received after this date | SINCE 1-Nov-2009 |
| BEFORE | Mail received before this date | BEFORE 1-Nov-2009 |
| DELETED | Mails marked as deleted | DELETED |
| SUBJECT | Mails containing string in the subject | SUBJECT "Proposal" |
| BODY | Mails containing string in the body | BODY "Hello Greg" |
| NOT | Mails which do not match the key | NOT FROM "user@example.org" |
| OR | Mails which match either of key1 or key2 | OR FROM "user@example.org" FROM "user2@example.org" |
There are quite a bit more of these, "RfC 2060":http://www.faqs.org/rfcs/rfc2060.html lists all possible options. But the ones above are probably the most commonly used.
Please be aware that the full text searches (TEXT and BODY) can be probibitively expensive if the server does not keep a full text search database of the messages. Getting an answer to such a query may take a very long time.
. SEARCH FROM "user@example.org" BEFORE 1-Nov-2009
* SEARCH 5 10 456
. OK Completed
h3. Fetching messages
Now that SEARCH has turned up some messages it might be a good idea to take a look at the contents. The FETCH command takes a list of sequence numbers or UIDs (as with SEARCH there are two variants, FETCH and UID FETCH) and a list of the information we are interested in. The most commonly used parts are:
|_. Part name |_. Part description |
| BODY[TEXT] | Just the mail body, without the headers |
| BODY[HEADER] | The mail headers |
| BODY[HEADER.FIELDS ( | Just the header fields indicated in list |
| )]
BODY[] | The entire mail text, header and body |
| BODY.PEEK | Works as BODY does, but does not mark the mail as seen |
| FLAGS | Flags set for the message |
| UID | The UID of the message |
As above, RfC 2060 has all the gory details.
. FETCH 5 (FLAGS BODY[HEADER.FIELDS (To)])
* 5 FETCH (FLAGS (\Seen) BODY[HEADER.FIELDS (To)] {24}
To: user@example.com
)
. OK Completed
h3. Deleting messages
Deleting messages in IMAP is a bit tricky, as there is no explicit delete command. Instead, a flag is set on the message marking it as deleted. This, by itself, does nothing to get the message removed. Just when a special command is called all messages in the current folder marked as to be deleted are removed[1].
. UID SEARCH ALL
* 1 EXISTS
* 1 RECENT
* SEARCH 1814
. OK Completed
. UID STORE 1814 +FLAGS (\Deleted)
* 1 FETCH (FLAGS (\Recent \Deleted \Seen) UID 1814)
. OK Completed
. EXPUNGE
* 1 EXPUNGE
* 0 EXISTS
* 0 RECENT
. OK Completed
. UID SEARCH ALL
* SEARCH
. OK Completed
The above is executed in a folder containing just a single message (see the result of the UID SEARCH ALL). The flag \Deleted is then added to flag list of the message (UID STORE 1814 +FLAGS (\Deleted)). The STORE command returns the new flag list. The EXPUNGE command then removes the message.
h3. Leaving IMAP
When finished with the session the last thing to do is to leave:
. logout
Connection closed by foreign host
$
fn1. The manual page for the rather excellent perl module Mail::IMAPClient had the following to say about this:
bq. In case you’re curious, expunging a folder deletes the messages that you thought were already deleted via "delete_message" but really weren't, which means you have to use a method that doesn't exist to delete messages that you thought didn't exist. (Seriously, I'm not making any of this stuff up.)
Unfortunately this gem has disappeared from newer versions of the manual page.
Sunday, September 13. 2009
SSL cipher settings
h3. The Problem
Securing network services with SSL is, in general, a good idea, if you can spare the CPU cycles. Especially personal data should always be protected while in transit via the network. But it may not be enough to simply enable SSL in the service (be it Apache, Lighttpd, Cyrus IMAPD or something else) to get a reasonably secure connection.
SSL is a cover phrase for a wide collection of protocols and crypto algorithms. There are at least three protocol suites in use (SSLv2, SSLv3 and TLSv1), which between them support tens of different crypto algorithms with different strengths. Not all of those are still suitable for serious use today.
A list of the ciphers supported by the popular "OpenSSL library":http://openssl.org, which is used by many projects to handle SSL, can be obtained with the following command:
$ openssl ciphers -v 'ALL:COMPLEMENTOFALL'
DHE-RSA-AES256-SHA      SSLv3 Kx=DH       Au=RSA  Enc=AES(256)  Mac=SHA1
DHE-DSS-AES256-SHA      SSLv3 Kx=DH       Au=DSS  Enc=AES(256)  Mac=SHA1
...
$
On my notebook (running Fedora 11) this produces a list of 62 ciphers. The number of ciphers supported changes with the version of OpenSSL, so other systems may display a different list.
During an SSL handshake between a client and a server the cipher to use is negotiated between the two machines. In practical terms this means that the client send list of ciphers it is able and willing to use to the server, the server compares this list with it's own list of supported ciphers and, if a cipher supported by both sides is found returns it's choice to the client.
h3. Defaults
Unless something else is configured, a server using OpenSSL uses the "DEFAULT" group of ciphers. The content of this group can also change between versions of OpenSSL. The value for the installed version can be queried:
$ openssl ciphers -v 'DEFAULT'
DHE-RSA-AES256-SHA      SSLv3 Kx=DH       Au=RSA  Enc=AES(256)  Mac=SHA1
DHE-DSS-AES256-SHA      SSLv3 Kx=DH       Au=DSS  Enc=AES(256)  Mac=SHA1
...
$
This list is shorter than the list of all ciphers above, containing 44 ciphers on my notebook. This list is not entirely nonsensical. It does not contain ciphers without encryption (yes, that is a valid mode of operation for SSL), it does not contain ciphers without authentication (which would allow for Man-in-the-middle attacks). It does, however, contain ciphers whose strength in this day and age must be questioned. These include the so called "export" ciphers.
These ciphers stem from a time when it was illegal to export software from the United States which supported strong encryption. So software supporting encryption (for example web browsers, like the venerable Netscape Nagivator) destined for export only supported watered down versions of the strong encryption variants, mostly by supporting shorter keys. Fortunately it is no longer illegal to export strong crypto from the United States, and hasn't been for years, but for compatibility reasons OpenSSL is still willing to negotiate these weak ciphers with a client.
Another weak candidate is the "DES algorithm":http://en.wikipedia.org/wiki/DataEncryptionStandard. It was made a standard in 1976 (which is an eternity ago in IT terms). Although it was never cryptographically broken, it's key length of 56 bits made it increasingly more vulnerable to brute force attacks as faster CPUs became available. Since the "Electronic Frontier Foundation":http://www.eff.org demonstrated a custom-built DES cracker in 1998, built for $250.000 and able to brute-force a DES key in under two days, DES has been effectively dead. But, for compatibility reasons, OpenSSL is, by default, willing to negotiate DES as a cipher.
OpenSSL can be told which ciphers to offer in an SSL negotiation, and thankfully most programs using OpenSSL offer configuration statements so the admin can change the default settings.
h3. Selections
Which ciphers should be used then? Let's start with all the ciphers supported by the SSLv3/TLSv1 cipher suite (which every program offering SSL should support, the use of SSLv2 is strongly discouraged due to vulnerabilities). And we only want ciphers which offer high security (which in OpenSSL terms means more than 128 bits key length, plus some ciphers with 128 bit keys). To be on the safe side we also explicitly disable SSLv2 ciphers, so they cannot be reintroduced later:
$ openssl ciphers -v 'TLSv1+HIGH:!SSLv2'
DHE-RSA-AES256-SHA      SSLv3 Kx=DH       Au=RSA  Enc=AES(256)  Mac=SHA1
DHE-DSS-AES256-SHA      SSLv3 Kx=DH       Au=DSS  Enc=AES(256)  Mac=SHA1
...
$
25 ciphers match this list, but it also contains ciphers without authentication. These have to go, along with all ciphers without encryption (there should not be any, but better save than sorry):
$ openssl ciphers -v 'TLSv1+HIGH:!SSLv2:!aNULL:!eNULL'
DHE-RSA-AES256-SHA      SSLv3 Kx=DH       Au=RSA  Enc=AES(256)  Mac=SHA1
DHE-DSS-AES256-SHA      SSLv3 Kx=DH       Au=DSS  Enc=AES(256)  Mac=SHA1
...
$
20 remain. It's my personal preference to disable ciphers based on triple-DES (3DES), so these are removed, too. There is no technical reason for this, 3DES is still considered secure.
Finally, the remaining ciphers are sorted by strength, the most secure first, which will make OpenSSL prefer those.
$ openssl ciphers -v 'TLSv1+HIGH:!SSLv2:!aNULL:!eNULL:!3DES:@STRENGTH'
DHE-RSA-AES256-SHA      SSLv3 Kx=DH       Au=RSA  Enc=AES(256)  Mac=SHA1
DHE-DSS-AES256-SHA      SSLv3 Kx=DH       Au=DSS  Enc=AES(256)  Mac=SHA1
...
On my notebook 14 ciphers remain. For comparison, on my web server (running CentOS 5) this selection only produces 6 ciphers, due to an older version of OpenSSL.
There is, however, two problem with this list. First, it does no longer contain the export or simple DES ciphers (which was kind of the point). This means that SSL services secured with this selection are no longer available to SSL client which only support export grade ciphers. This is a good thing, as these clients are insecure and need to be replaced with something more recent. Depending on the details of the service this option may not be available, though. Please check if these old ciphers must be supprted further before turning them off.
The second problem is Windows. In detail, Windows versions before and including Windows XP. The crypto libraries shipped with these versions do not support newer crypto algorithms (like AES), so there is no overlap between the set of algorithms supported by the server and those supported by the client. These crypto libraries are primarily used by Internet Explorer, Outlook and Outlook Express, so these programs on Windows XP and earlier will not be able to negotiate an SSL connection to a web or mail server. Other web browsers and mail clients (like Firefox and Thunderbird) usually ship with their own crypto libraries which do support modern algorithms, and are not affected. The system crypto libraries in Windows Vista and Windows 7 are also not affected.
If support for older Windows versions cannot be dropped (likely), the cipher list needs to be extended by some RC4 ciphers (which Windows does support):
$ openssl ciphers -v 'TLSv1+HIGH:!SSLv2:RC4+MEDIUM:!aNULL:!eNULL:!3DES:@STRENGTH'
DHE-RSA-AES256-SHA      SSLv3 Kx=DH       Au=RSA  Enc=AES(256)  Mac=SHA1
DHE-DSS-AES256-SHA      SSLv3 Kx=DH       Au=DSS  Enc=AES(256)  Mac=SHA1
...
$
This brings the number of ciphers up to 19, the new RC4 ciphers are added at the end of the sorted list.
h3. Configuration
Now that the cipher list is complete the various services that use SSL need to be configured to use it. Instructions how to do this can be found in the documentation, examples for some services are below.
h4. Exim
Add the following line to the global (first) configuration section and restart Exim:
tls_require_ciphers = TLSv1+HIGH : !SSLv2 : RC4+MEDIUM : !aNULL : !eNULL : !3DES : @STRENGTH
h4. Lighttpd
Add the following line to the configuration section containing ssl.engine = "enable" and restart Lighttpd:
ssl.cipher-list = "TLSv1+HIGH !SSLv2 RC4+MEDIUM !aNULL !eNULL !3DES @STRENGTH"
h4. Cyrus IMAPD
Add the following line in imapd.conf and restart Cyrus:
tls_cipher_list: TLSv1+HIGH:!SSLv2:RC4+MEDIUM:!aNULL:!eNULL:!3DES:@STRENGTH
h3. Testing
In order to test the new settings, a connection attempt using an excluded cipher can be made (which should fail, of course):
$ openssl s_client -host www.skytale.net -port 443 -cipher 3DES
CONNECTED(00000003)
140209911707464:error:14077410:SSL routines:SSL23_GET_SERVER_HELLO:sslv3 alert handshake failure:s23_clnt.c:672:
---
no peer certificate available
---
No client certificate CA names sent
---
SSL handshake has read 7 bytes and written 58 bytes
---
New, (NONE), Cipher is (NONE)
Compression: NONE
Expansion: NONE
---
A successful attempt (letting openssl select the best cipher) negotiates AES with a 256 bit key:
$ openssl s_client -host www.skytale.net -port 443
CONNECTED(00000003)
...
---
SSL handshake has read 1281 bytes and written 309 bytes
---
New, TLSv1/SSLv3, Cipher is AES256-SHA
Server public key is 1024 bit
Compression: zlib compression
Expansion: zlib compression
SSL-Session:
Protocol  : TLSv1
Cipher    : AES256-SHA
Session-ID: --removed--
Session-ID-ctx:
Master-Key: --removed--
Key-Arg   : None
Krb5 Principal: None
PSK identity: None
PSK identity hint: None
Compression: 1 (zlib compression)
Start Time: 1252852959
Timeout   : 300 (sec)
Verify return code: 21 (unable to verify the first certificate)
---